 Lynden Siding
 Building New in Kendall? Get the Windows Right the First Time
New construction is the one chance to install windows the correct way from the start — before siding, trim, and interior finishes make corrections expensive. In the Kendall area, that first-time correctness matters more than it does in drier parts of the country. Whatcom County sends a steady mix of marine air, wind-driven rain, and long stretches of damp, shaded weather that turns any shortcut in window flashing or sealant work into a moisture problem a few years down the road, usually hidden behind drywall until it isn't.
We install new-construction windows on homes going up in and around Kendall as part of our regular service area out of Lynden. This page covers what a correct installation actually involves, what we watch for given the local climate, and how our process works from rough opening to final trim.
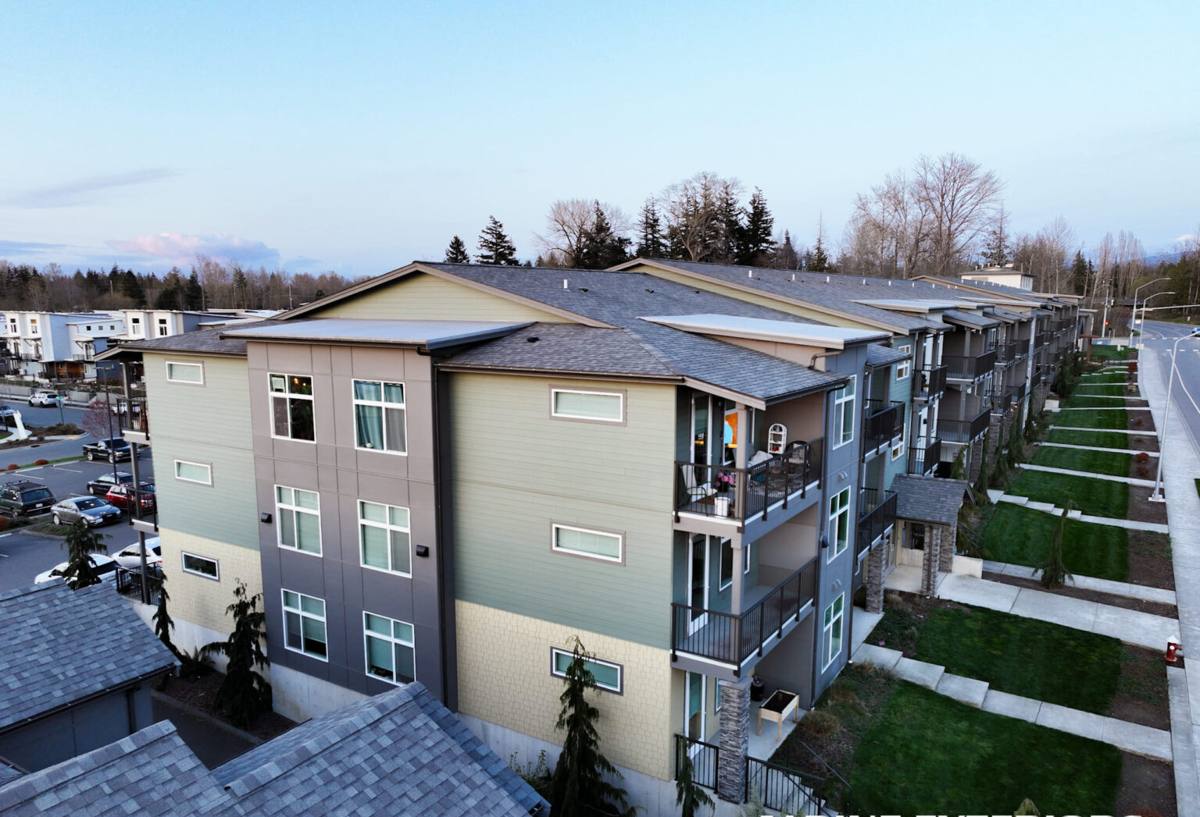
What This Climate Does to a New Window Opening
New-construction windows have an advantage over replacement windows: the wall is open, so the flashing and water management layers can be built correctly instead of worked around. That advantage only pays off if the crew installing the window understands what the local weather is going to throw at that opening for the next several decades.
- Driving rain: Wind-driven rain doesn't just fall on a window, it pushes sideways and upward against the frame, testing every seam in the flashing and sealant.
- Marine air and humidity: Constant moisture in the air slows drying time for any water that does get behind the cladding, which is why a proper drainage plane matters as much as the seal itself.
- Moss and organic growth season: Long stretches of shaded, damp weather feed moss and algae growth on north-facing walls and around window trim, which holds moisture against the frame if drainage paths are blocked.
- Temperature swings: Whatcom County still gets real seasonal swings, and framing lumber and window units expand and contract — installation needs to account for that movement, not fight it.
None of this is unique to Kendall specifically, but it's the reality for this part of Whatcom County, and it's why we treat window flashing as a system, not a caulk gun task.
What a Correct New-Construction Window Installation Involves
"New-construction" refers to windows with a nailing flange (fin) designed to be fastened directly to the framed wall sheathing before the weather-resistive barrier (WRB) and siding go on. Done right, the water management works in layers, each one shedding water down and out before it ever reaches the framing.
The layers, in order
- Rough opening prep — squared, correctly sized, and inspected before the window ever shows up on site.
- Sill pan flashing — a sloped, sealed pan at the bottom of the opening that catches any water that gets past the window and directs it back outside, not into the wall cavity.
- Window placement and fastening — set plumb, level, and square, shimmed correctly so the frame isn't racked or bowed, fastened per the manufacturer's schedule.
- Flange and flashing tape integration — jamb flashing up the sides, head flashing at the top, each piece lapped correctly (bottom to top, like shingles) so water always sheds outward.
- WRB tie-in — the house wrap or building paper laps over the flashing at the top and sides in the right sequence, maintaining a continuous drainage plane behind the siding.
- Interior and exterior sealant — backup, not the main defense. If sealant is doing the primary water-stopping work, something upstream was skipped.
Every one of those steps is inspectable at the time it's done and nearly impossible to verify once siding covers it. That's the real argument for hiring a crew that does this correctly by default, not one that's hoping the caulk holds.
Where New-Construction Window Installs Go Wrong
Most window-related water damage we get called out to investigate on older homes traces back to one of a handful of installation mistakes made when the house was built — mistakes that were invisible for years:
| Common Mistake | Why It Fails Here |
|---|---|
| No sill pan flashing, or a flat/unsealed one | Any water that gets past the window sits on bare sheathing instead of draining out — a slow leak that rots framing over several wet seasons |
| Flashing tape lapped in the wrong order | Reverse-lapped flashing directs driving rain into the wall instead of over it |
| WRB tucked behind the flange instead of over it | Breaks the shingle-lap drainage path at exactly the point most exposed to wind-driven rain |
| Over-reliance on sealant instead of flashing | Sealant degrades with UV and movement over time; flashing is the permanent water management layer |
| Rough opening cut too tight or too loose | Forces the frame out of square, stressing seals and hardware, or leaves gaps that get stuffed with foam instead of shimmed correctly |
Every one of these is a labor and sequencing issue, not a product issue — which is why the installing crew matters at least as much as the window brand.
Choosing Frame Materials for a Kendall New Build
We install several window lines rather than pushing one manufacturer, because the right choice depends on the home's design, budget, and exposure. For a new build in this climate, frame material is the first real decision.
| Frame Material | Moisture Tolerance | Maintenance | Typical Fit |
|---|---|---|---|
| Vinyl | Good — won't rot, but relies fully on correct flashing since the frame itself doesn't manage water | Low | Budget-conscious new builds, rental or spec homes |
| Fiberglass | Very good — dimensionally stable, holds paint and finish well in damp climates | Low to moderate | Homes wanting a durable, long-term frame with a more refined look |
| Wood-clad (aluminum or vinyl exterior, wood interior) | Good on the exterior face; interior wood needs the cladding and flashing to stay intact to avoid hidden moisture exposure | Moderate — depends on cladding integrity over time | Homes prioritizing interior wood trim and a traditional look |
We don't recommend bare wood-frame windows for new construction in this part of Whatcom County unless the exposure is well protected by roof overhangs — the maintenance burden and moisture sensitivity are real trade-offs given how much damp weather these windows sit through every year.
Washington Energy Code and Window Performance
New-construction windows in Washington have to meet the state energy code's requirements for U-factor (how well the window resists heat loss) as part of the whole-house energy path the builder is using. In practice, that means the window schedule on the plans usually already specifies a minimum performance rating, and our job is to confirm the units ordered actually meet it — not just look similar to what's specified.
Beyond the code minimum, we talk through a few performance factors with homeowners and builders directly:
- U-factor: lower is better for heat retention through our cool, wet winters.
- Solar heat gain coefficient (SHGC): matters more on south and west-facing glass, less on shaded north walls.
- Air leakage rating: a tighter rating reduces drafts, which matters when driving rain is also testing the seal.
- NFRC label verification: we confirm the performance labels on the actual units delivered, not just the catalog spec, since substitutions happen.
Our Installation Process, Start to Finish
Working on a new build usually means coordinating with a general contractor's schedule, so we keep this tight and predictable:
- Plan review — we check the window schedule against the actual openings framed on site before anything is ordered or set, catching sizing mismatches early.
- Rough opening inspection — verified square, plumb, and correctly sized, with any framing corrections flagged before install day.
- Sill pan and flashing install — built in sequence, per opening, before the window goes in.
- Window setting — plumb, level, square, shimmed and fastened to manufacturer spec.
- Flange flashing and WRB integration — taped and lapped in the correct order, tied into the house wrap the framer or GC has installed.
- Interior and exterior sealant and insulation — gaps insulated (not overpacked), sealant applied as the backup layer, not the primary one.
- Walkthrough — every opening checked for operation, seal, and squareness before we leave the site.
We show up on the schedule the builder gives us, work around trade sequencing, and flag anything in the framing or plans that needs attention before it becomes a change order later in the build.
Why the Installing Crew Matters More Than the Window Brand
A high-performance window installed with reversed flashing laps will leak. A mid-range window installed with a correct sill pan, proper lap sequence, and clean WRB tie-in will hold up for decades. We say this plainly because it's true, and because it's the reason to evaluate a contractor's installation process as carefully as the window lineup they carry.
Working regularly in Kendall and throughout the Lynden area means we already know how this climate treats a building envelope over time — which walls take the worst of the driving rain, how fast moss establishes on shaded siding, and where builders in this area tend to under-detail flashing because it's not visible at final walkthrough. That local pattern recognition is worth more than any single product spec.
Quick Checklist for Homeowners and Builders
- Rough openings squared and sized to the actual window schedule before delivery
- Sill pan flashing installed and sloped to drain outward on every opening
- Flashing tape lapped bottom-to-top, sides before head flashing
- WRB integrated over the top flange, maintaining a continuous drainage plane
- Sealant used as backup, not as the primary water seal
- NFRC performance labels checked against the specified U-factor and SHGC
- Every window operated and inspected before the crew leaves site
Let's Talk About Your Kendall Build
Whether you're a homeowner working directly with us or a general contractor coordinating trades, we're happy to walk through your window schedule and framing plans before installation day. If you're planning a new build in the Kendall or greater Lynden area, reach out for a free, no-pressure estimate — we'll look at your plans, talk through window and frame options for your site, and give you a straight answer on scope and timeline using the form below.