 Lynden Siding
 Building New in Bellingham? Get the Windows Right the First Time
New construction is the one time a window installation can be done exactly right, with no shortcuts forced by existing framing, old flashing, or a homeowner living around the work. That advantage disappears fast if the crew doesn't understand what Whatcom County weather actually does to a house. Bellingham sits close enough to the water that salt-laden air, wind-driven rain off the Strait, and a long, damp moss season are just part of the deal. Windows installed correctly at the framing stage will handle all of that for decades. Windows installed with generic techniques from a drier climate tend to show problems within a few years — usually around the window, not because of the window itself.
We install new-construction windows for homes throughout the Lynden and Bellingham area, and this page is about that specific job: what the local climate demands, what a correct installation actually involves, and how our process is built around getting it right while the walls are still open.
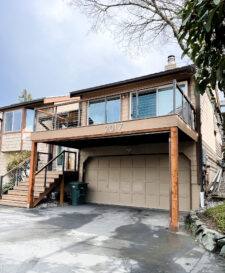
What Bellingham's Climate Demands From a New Window Install
Salt Air and Coastal Moisture
Proximity to Bellingham Bay and the Strait of Georgia means the air carries more salt and moisture than it does further inland in Whatcom County. Salt-laden moisture accelerates corrosion on unprotected fasteners, cheaper cladding, and any metal flashing that isn't rated for it. It also means humidity sits higher for more of the year, which matters for how a window assembly dries out if it ever gets wet behind the surface.
Driving Rain
Storms coming off the water often bring wind-driven rain rather than straight-down rain. Wind-driven rain hits window assemblies sideways and gets pushed up under trim and into gaps that would stay dry in a calmer climate. New-construction installation gives us the chance to build a drainage path and flashing system that assumes rain will be driven sideways, not just falling straight.
Moss Season
Bellingham's moss season runs long — shade, moisture, and mild temperatures are exactly what moss wants, and it will colonize any surface that stays damp, including window sills, trim, and the siding around a window opening. Moss holds moisture against building materials, and moisture held in place is what eventually causes rot. A window opening that's flashed and sealed correctly sheds water fast enough that moss doesn't get the standing dampness it needs to take hold around the frame.
What a Correct New-Construction Window Install Involves
"New-construction window" refers to a window style with a nailing flange built into the frame, meant to be installed before the exterior wall covering goes on. Getting the water management right at this stage is what actually determines how the window performs for the next 20-30 years.
- Rough opening prep — checking the opening is square, level, and sized correctly before the window ever gets set.
- Sill pan flashing — a sloped, watertight pan under the window opening so any water that gets past the window has a built-in path back outside instead of soaking into the framing.
- Weather-resistive barrier integration — the housewrap or building paper has to be layered with the flashing in the correct shingle-lap order (upper layers over lower layers) so water is always directed outward and down, never trapped behind a layer.
- Flange sealing and fastening — the nailing flange gets sealed and fastened per the manufacturer's pattern, not just tacked in place, so wind-driven rain can't work its way behind the flange.
- Head flashing — a flashing above the window that directs water around the top corners instead of down the face of the frame.
- Interior and exterior sealant — appropriate sealants at the right joints, not sealant used as a substitute for proper flashing.
- Insulation at the perimeter gap — filling the gap between the window frame and the rough opening without overpacking it, which can bow the frame and cause the window to operate poorly.
Skip or shortcut any one of these steps and the window itself can be a fine product while the wall around it still fails. Most window leaks and rot problems we get called out to inspect trace back to flashing and sequencing, not the window.
Our Process on New-Construction Jobs
Plan Review and Product Selection
We start by looking at the window schedule and elevations for the home, and talk through frame material, glass package, and performance ratings against how exposed each elevation is. A window facing the prevailing weather off the water often warrants a different spec than one on a sheltered elevation.
Coordinating With the Build Schedule
Window installation has to land at the right moment in the framing sequence — opening prepped, weather barrier in place, but before siding or trim closes things up. We coordinate directly with the builder or general contractor so windows go in at the correct point, not rushed in early or delayed until it's inconvenient to flash correctly.
Flashing and Installation
This is where the climate-specific work happens: sill pans, correctly lapped flashing, sealed flanges, and head flashing, installed in the sequence that actually sheds water in a wind-driven rain event. We follow manufacturer flashing instructions because that's what keeps the window's warranty intact.
Quality Check Before Closing the Wall
Before siding or exterior finish goes over the window, we check that flashing laps are correct, sealant is placed where it should be, and the window operates smoothly with nothing binding. This is the last point where a flashing mistake is cheap to fix — after the wall is closed, it isn't.
Choosing Window Materials for This Climate
Frame material matters more here than in a dry climate, because the frame is dealing with sustained moisture exposure and, depending on how close to the water the home sits, some salt exposure too.
| Frame Material | How It Handles Local Conditions | Maintenance Consideration |
|---|---|---|
| Vinyl | Doesn't rust or corrode from salt air; handles moisture well | Low maintenance, but quality varies a lot between manufacturers |
| Fiberglass | Very stable in moisture and temperature swings; strong against wind-driven rain pressure | Low maintenance, higher upfront cost |
| Wood (unclad) | Attractive, but needs consistent upkeep in a damp, salt-influenced climate | Requires regular refinishing to prevent moisture damage |
| Wood-clad (vinyl or aluminum exterior) | Wood interior warmth with a weather-facing exterior shell | Cladding needs to be properly sealed at the frame joints or moisture can get trapped underneath |
| Aluminum | Strong but conducts heat/cold and can be prone to condensation without a thermal break | Look for a thermally broken profile in this climate |
We don't push any one brand or material as universally "best" — the right call depends on the home's exposure, the builder's budget, and the design intent. What we won't do is install a frame or configuration in an exposed, wind-driven-rain elevation without making sure the flashing detail actually matches how that product is designed to shed water — that's a maintenance and moisture-callback risk we're not willing to take on for a client.
Cost Factors for New-Construction Windows
Costs vary by project, but the main factors that move the number on a Bellingham-area new build are:
| Factor | Why It Affects Cost |
|---|---|
| Frame material | Vinyl, fiberglass, wood, and clad options carry different material costs |
| Window count and size | More openings and larger units mean more material and labor |
| Glass package | Higher-performance glazing (for energy code or noise) costs more than standard double-pane |
| Elevation exposure | Elevations facing prevailing wind-driven rain may call for upgraded flashing details |
| Access and building stage | Coordinating install timing with the framing schedule affects labor efficiency |
We give a written estimate scoped to the actual window schedule for your project rather than a generic per-window rate, since exposure and product choice change the real cost.
Why Hiring a Crew That Already Works in Bellingham Matters
A crew that mostly works in a dry inland climate can install a window that looks fine and passes a casual glance, but still fails against Whatcom County's combination of salt air, wind-driven rain, and moss season. Getting flashing sequencing right for this climate isn't guesswork you can pick up from a generic manual — it's something that comes from actually dealing with what this weather does to a building over time.
Working regularly in and around Lynden and Bellingham also means we're familiar with local permitting and inspection expectations, and we know which elevations on a typical Bellingham lot take the worst of the weather so we can flag those during the planning stage rather than after a callback.
A Practical Checklist for Your New-Construction Window Installer
- Do they install a sloped sill pan under every window opening, not just caulk the sill?
- Can they explain their flashing lap sequence (how the weather barrier, flashing, and flange layer together)?
- Do they follow the specific manufacturer's flashing instructions for warranty compliance?
- Do they coordinate installation timing with your builder's framing schedule?
- Will they do a pre-closure check before siding or exterior finish covers the window?
- Do they have experience with wind-driven rain exposure on coastal-adjacent Whatcom County builds?
Let's Talk About Your Bellingham New Build
Whether you're framing a single home or coordinating windows across a multi-unit project, getting the water management right at the new-construction stage saves years of maintenance headaches later. If you'd like a straightforward look at your window schedule and a written estimate, request a free, no-pressure estimate using the form below — we're happy to walk through material options and flashing details specific to your site.